People
Allows you to provide visitors the opportunity to strengthen their relationships with your organization by sharing valuable information that will help you stay in contact with them and better meet their needs.
Who has access:
You must have one of the checked permissions to use this manager.
Guest
Member
Contributor
Editor
Administrator
People Coordinator
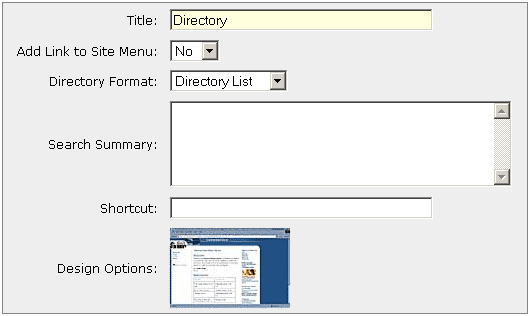
- TITLE: Enter a title for your People section. This title will appear on your main menu should you choose to display the link.
- ADD LINK TO SITE MENU: Select "Yes" from the drop down list to display the link on your main menu. Select "No" from the drop down list so the link does not appear on your main menu.
- DIRECTORY FORMAT:Select the default view visitors to your site will see when they go to the People manager page. You can select Directory List, Text Directory or Photo Directory as the default view.
- SEARCH SUMMARY: Enter descriptive information to be used for Search Engine data and Site Search data.
- SHORTCUT: This allows you to make a shortcut to your People manager page. It will be a one word entry (i.e. people). It can be accessed on the Web by typing in www.yourdomainname/shortcutname. (For example: www.yourdomain.com/people).
- DESIGN OPTIONS: Click the design option that is currently shown. A window will appear with all designs you made available in the Additional Designs section of your Designs manager. Select the design you want to apply to this page, which will close the Design Options window.
- Add/Edit People manager page content using the Page Editor. For help with the functionality of the Page Editor, see Using the Editor for more information.
- Click the Save
 icon in the upper right corner of your screen to save your People manager page settings.
 This feature is only applicable to those who have the People manager.
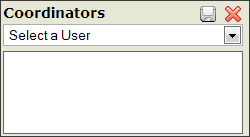
- Select an appropriate person from the drop down menu. The list of names that appear is populated from your People manager. The person must have an email address entered in your People manager in order to appear.
- Click the Save
 icon within the dialog box.
- Repeat steps 2 and 3 for each Coordinator you want to add.
- To delete a Coordinator, click the Delete
 icon to the left of the person's name.
Please visit our
Importing Data section for detailed information about Importing Data.
Visitor Registration - This method is popular because it allows individuals to enter their own data. This not only saves the administrator time, but also allows people to select their preferred content. This preferred content is how you can personalize information to an individual's home page.
To register, the person goes to your website and chooses the Register New User link. A series of screens prompts them for information. Once complete, this information is automatically stored in your People manager. Use the Registration Options dialog box to manage the settings for visitor registration.
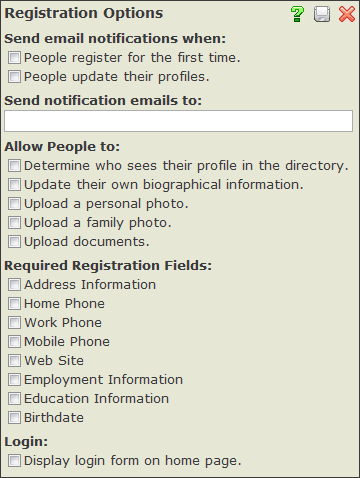
- SEND EMAIL NOTIFICATIONS WHEN: Choose to receive email notifications when a person registers on your site for the first time. You can also choose to receive email notifications when a person updates their existing profile.
- SEND EMAIL NOTIFICATIONS TO: Enter an email address you want to receive the registration and update notifications.
- ALLOW PEOPLE TO: Choose the actions a person can take when registering on your site or updating their existing profile.
- REQUIRED REGISTRATION FIELDS: Choose which fields are required when a person registers on your site or updates their existing profile.
- LOGIN: Turn the Login form On or Off on your Home Page. This will not turn off the "Just For You" personalization section.
Note: By default the login form will not display on your site until you select the "Display login form on home page" check box and save your Registration Options. If your login form still does not display, make sure you set your People Manager Settings and save the Manager Settings page.
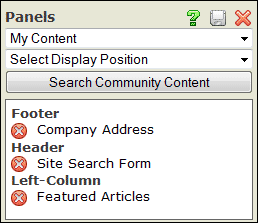 Add/Delete Panels
- Click the Panels tab.
- Using the first drop down menu, select the panel you wish to display.
- The panel you select will appear in the preview window at the bottom of the Panels dialog box.
- Using the second drop down menu, select the display position for the area you want the panel to appear on your site.
- Click the Save
 icon within the dialog box. Repeat this process for each panel you wish to add.
- To delete a panel placement, click the Delete
 icon to the left of the panel title.
Update Panel Position and Order
- Click the Panel Name
- Using the first drop down menu, select the display position for the area you want the panel to appear on your site.
- Using the second drop down menu, select the order in which you want the panel to display. By selecting "1", the panel will appear first within its assigned position. By selecting "2", the panel will appear second within its assigned position.
- Click the Save
 icon within the dialog box. Repeat this process for each panel you wish to update.
Search Community Content
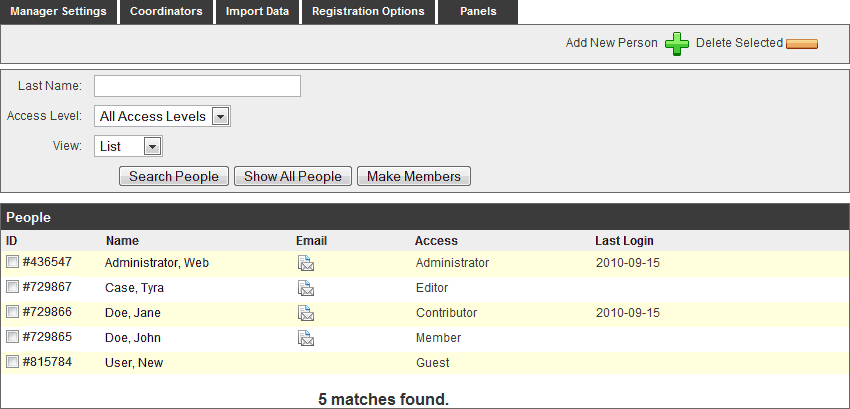
- LAST NAME: Type the person's last name or just the first few letters of their last name.
- ACCESS LEVEL: Choose the access level for the people you would like displayed. View an explanation of levels.
- VIEW: Choose "List" to view a list of people that match your search criteria. Choose "Export" to display information available for export to an outside program such as Excel. This data is formatted so that it can be easily copied and pasted into a spreadsheet program.
- SEARCH PEOPLE: Click this button to start your search. If you have not entered any criteria, all people will be displayed.
- SHOW ALL PEOPLE: Click this button to display all of the people in your People manager.
- MAKE MEMBERS: Select a person or people by checking the box to the left of the user's name. Click the Make Members button to change the selected person or people to have site-wide "Member" access.


 This feature is only applicable to those who have the
  Add/Delete Panels